What is Container Hosting?
A container is similar to a virtual machine and is used to run applications. However, the key difference is that containers are much more modular and can be set up faster than virtual machines. Containers share the kernel of the host operating system, making them lighter and less resource-intensive. They include everything needed to run an application, such as code, runtime libraries and dependencies, allowing applications to run quickly and reliably.
A container typically uses a read-only file system to ensure that the application within it runs in an immutable environment. This configuration enhances security and consistency by preventing any changes to the file system, which helps avoid unexpected modifications in production environments. Read-only file systems also make it easier to roll back to a stable version if something goes wrong. The only exceptions are temporary storage areas or specific directories allowed for writing, where runtime data can be stored.
Containers run in an isolated network and often require specific port allocations to communicate with external services or to be accessible from outside. Usually, the necessary ports are opened on the host system and assigned to the container, allowing it to communicate with other containers, services, or end-users. These port configurations are set during the container's startup and ensure that only authorized and necessary access occurs. With network plugins and container orchestration services, advanced network configurations can be created, such as setting up a cluster environment or isolated subnets for containers.
What applications can I run in container hosting?
In principle, almost any type of application can be run in a container hosting environment, as containers are flexible and customizable. They include all necessary dependencies and configurations to run the application consistently, regardless of the environment in which they operate. Here are some examples:
1. Pre-built Applications from Docker Hub
On Docker Hub, a central repository for container images, thousands of pre-built applications are available and ready to be used immediately. These include:
- Applications: such as Mattermost for team communication, Vaultwarden as a password manager, etc.
- Databases like MySQL, PostgreSQL, and MongoDB.
- Development tools like Jenkins for CI/CD pipelines or Gittea for version control.
- Application servers such as Node.js, Python, and many others that can directly run applications.
These pre-built images can often be started immediately and adjusted with just a few configurations, significantly speeding up deployment.
2. Custom Applications
Container hosting is perfect for self-developed applications. Developers can isolate their applications in containers, creating a consistent and portable environment that works independently of the host infrastructure. These containers can easily be moved to different environments—from local development to testing and production—without the need for configuration adjustments.
Containers are not limited to specific programming languages or frameworks and can run anything from web applications and database services to specialized backend services and APIs. Container hosting is ideal for microservices architectures, where each functionality runs in its own container and communicates over the network.
How Do I Configure My Container Hosting?
1. Starting, Stopping, and Updating Containers
With just a few clicks, you can start, stop, or update containers. This is especially useful if you want to roll out a new release or temporarily free up resources by stopping unused containers. The control panel allows you to check the status of each container at any time and make changes as needed.
2. Adjusting Your Container Definition
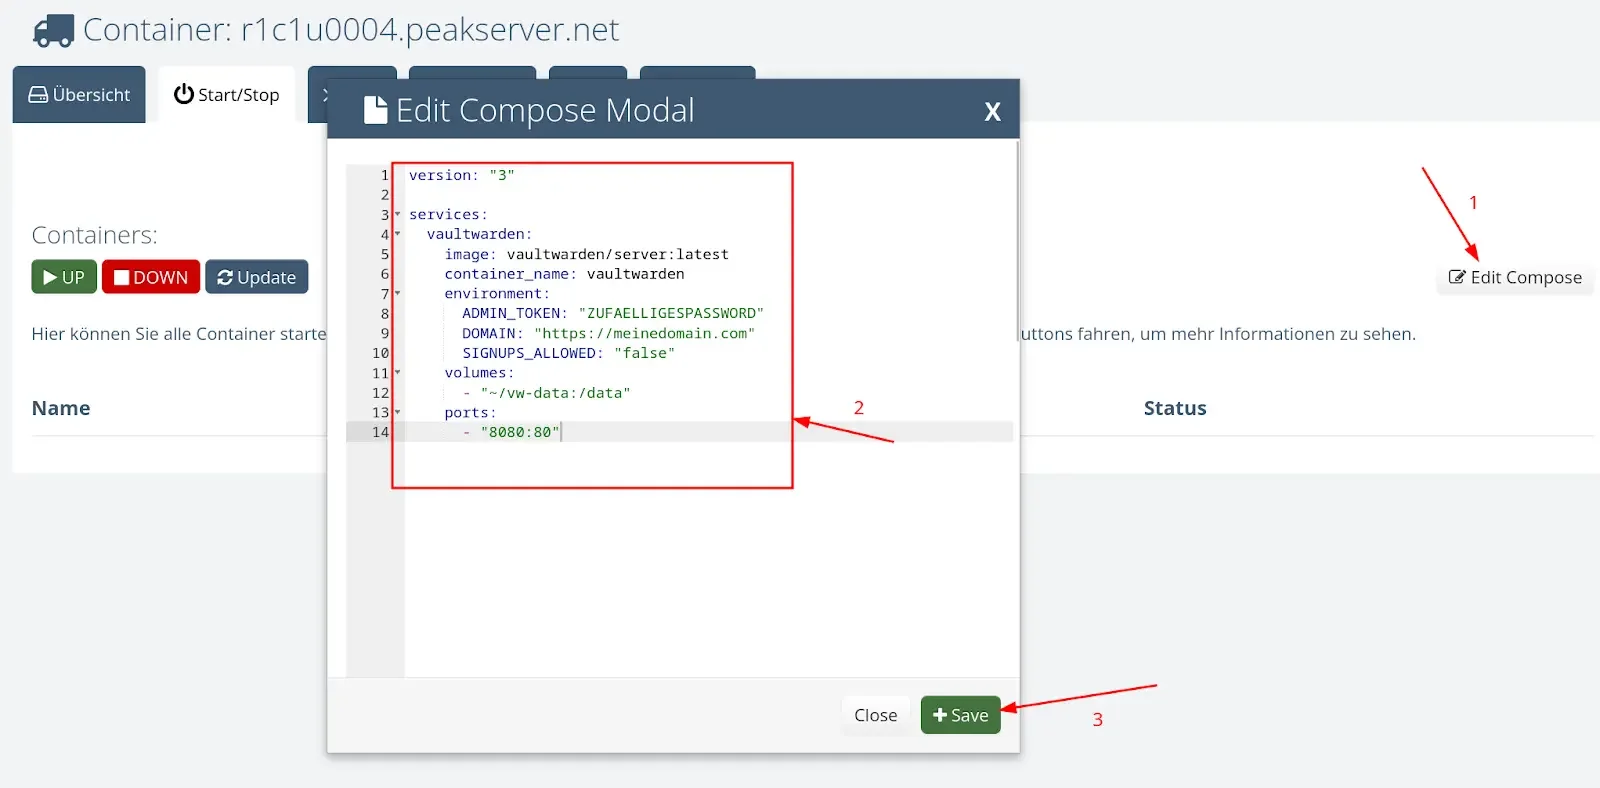
All containers running on your hosting are defined in an OCI-compliant Compose YAML file, which can be managed directly through the control panel.
The control panel allows you to do the following with your Compose YAML file:
- Add and delete containers: You can define new containers by simply adding the relevant sections to the YAML file. Similarly, you can remove containers that are no longer needed, simplifying environment management and saving resources.
- Adjust environment variables: Environment variables are essential for configuring your applications. You can easily adjust these variables in the control panel to change settings like database connections, API keys, or other configuration parameters without rebuilding the container.
- Modify network settings: You can adjust the network settings of your containers to ensure they communicate correctly with each other. This includes assigning networks or adjusting the ports used for container connections.
- Manage volumes: Volumes allow you to persist data used by containers. You can add new volumes or configure existing ones to retain data between container restarts or across containers.
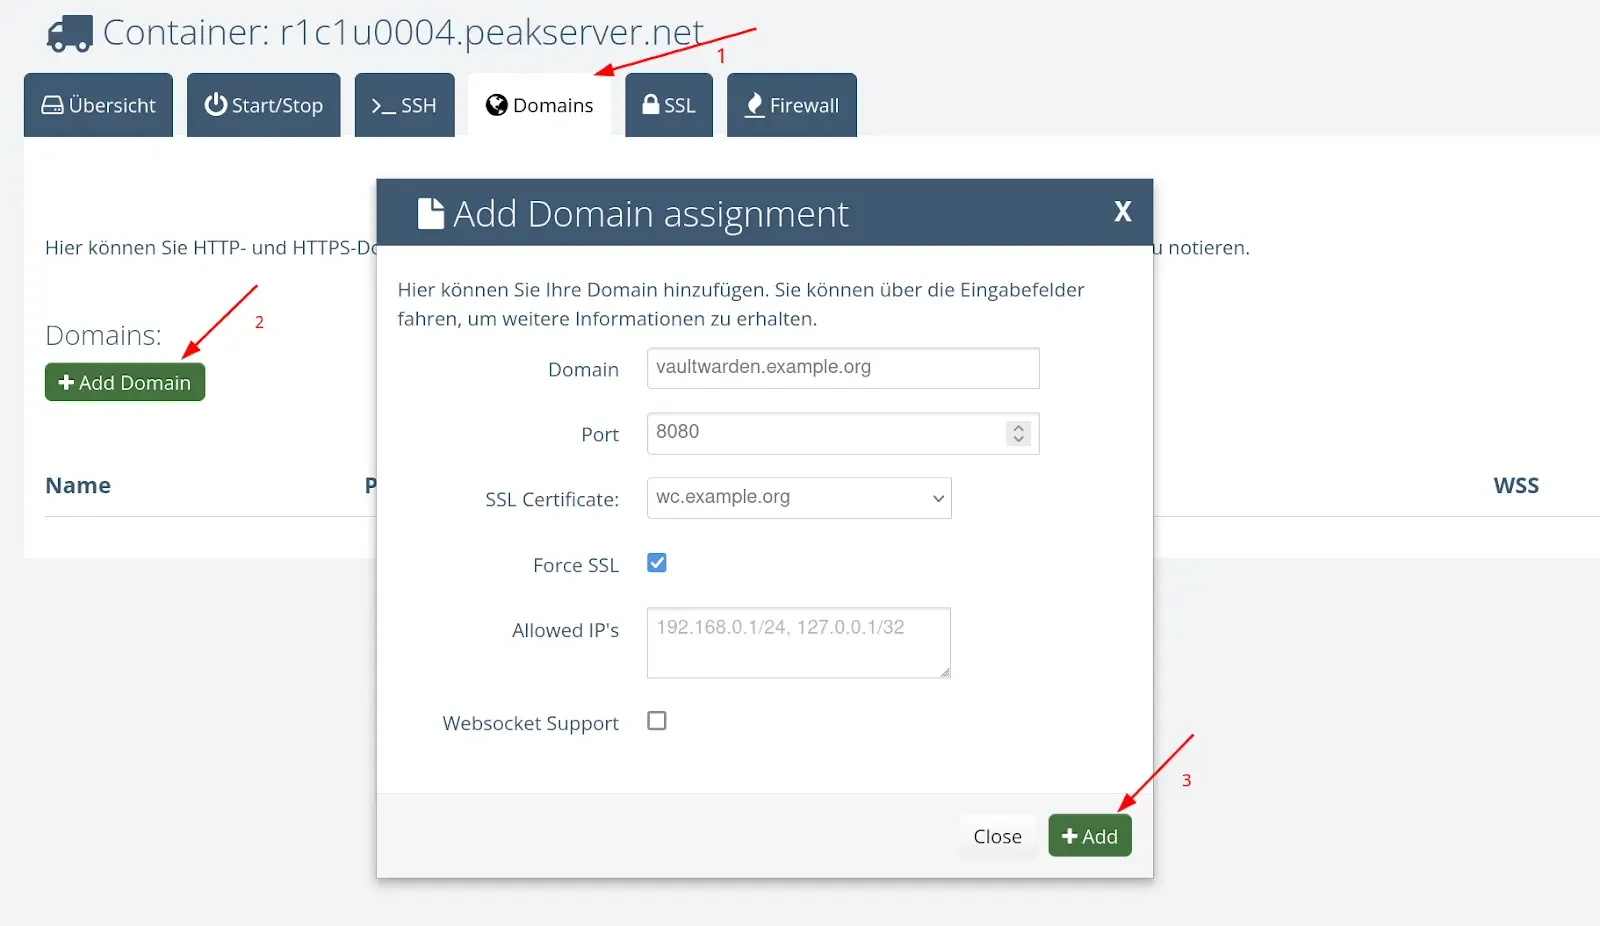
3. Bind Domains to Container Ports
You can bind domains directly to specific ports on your containers to ensure your applications are accessible over the internet. SSL certificates can also be enabled to encrypt the connection and enhance security. Additionally, the IP allowlist feature allows you to restrict access to your containers to specific IP addresses, adding extra security for sensitive applications.
4. Opening Ports
The control panel enables you to selectively open the ports of your containers to the outside. This feature is crucial if you want to run services using protocols other than HTTP, such as database connections (e.g., MySQL, PostgreSQL), SSH access, or APIs that communicate over specific ports. You can specify exactly which ports are opened for external access, ensuring precise control over your containers’ communication channels. This flexibility allows you to optimally integrate various applications and services while ensuring only authorized connections are permitted.
Example: Setting Up a Vaultwarden Password Manager Container
Vaultwarden is a free, open-source password manager that is excellent for managing your passwords. Setting it up via our control panel is very easy and straightforward. Here are the steps you need to follow:
Step 1: Enter the Vaultwarden service in the Compose editor
Open the Compose editor in your control panel and add the following configuration for the Vaultwarden container:
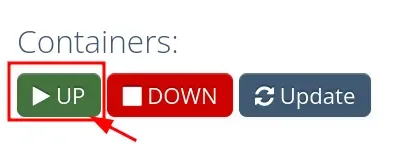
Step 2: Start Your Containers with the "UP" Button
After entering the configuration, click the "UP" button in the control panel to start your Vaultwarden container.
Step 3: Link Your Domain to the Vaultwarden Port (8080)
To ensure your application is accessible over the internet, link your domain to port 8080 of the Vaultwarden container. This can also be done through the control panel.
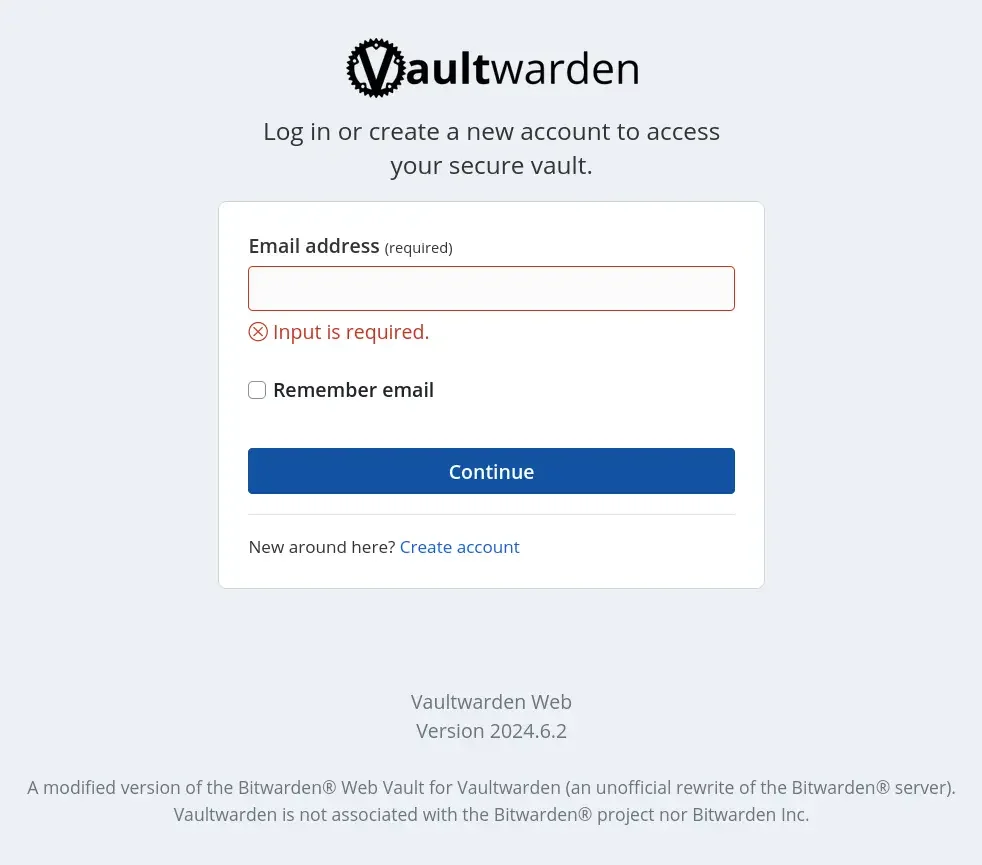
Step 4: Open Your Browser and Go to Your Vaultwarden URL
Once the containers are running and the domain is linked, open your web browser and go to your Vaultwarden URL, e.g., https://mydomain.com. You can now use Vaultwarden to securely manage your passwords.
Do I Get Support with the Setup?
Of course! This is managed container hosting. We offer comprehensive support for the setup and management of your containers.
Simply let us know which applications you want to run on your hosting and how they should be configured. Our team will then set everything up for you, so you can focus on your core competencies while we handle the technical implementation.
We assist you through every phase, from the initial setup to the configuration of containers and adjusting your applications. Additionally, we are available for any questions and maintenance to ensure your container hosting runs smoothly.
Whether you need help selecting the right containers, configuring networks, or optimizing resources, our support team is always here to ensure an efficient and successful implementation.
How Can I Access My Container Hosting via SSH?
1. SSH Container
Each user is given a dedicated SSH container through which you can establish a secure connection to your container hosting. This SSH container acts as a gateway, allowing you to access and manage your other containers.
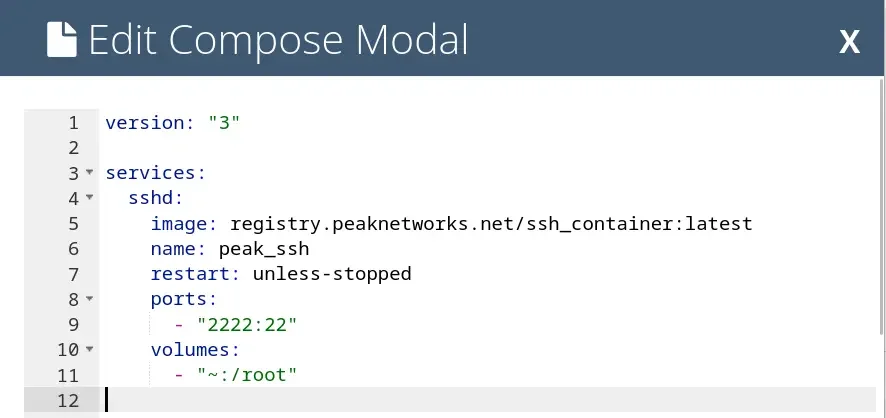
2. Store SSH Keys in the Control Panel
For authentication, you can store SSH keys in the control panel. This ensures a secure connection without the need to enter your password every time. You can manage both public and private keys to control access to your SSH container.
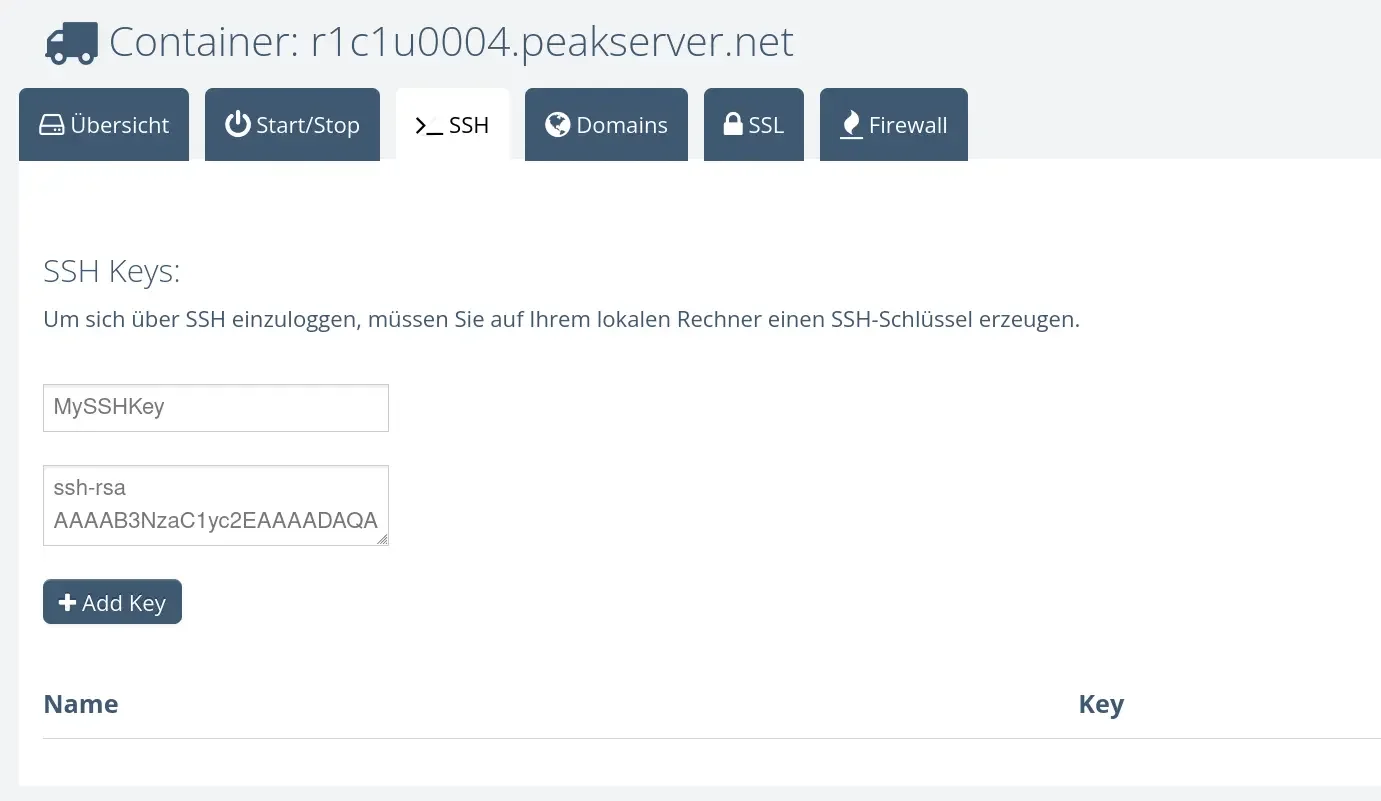
3. Install Packages and Adjust Configurations
Once you are connected to your SSH container, you have the ability to install packages and adjust configurations for your other containers. This allows you to customize your environment according to your applications' needs. You can install software, set environment variables, edit configuration files, and perform other administrative tasks.
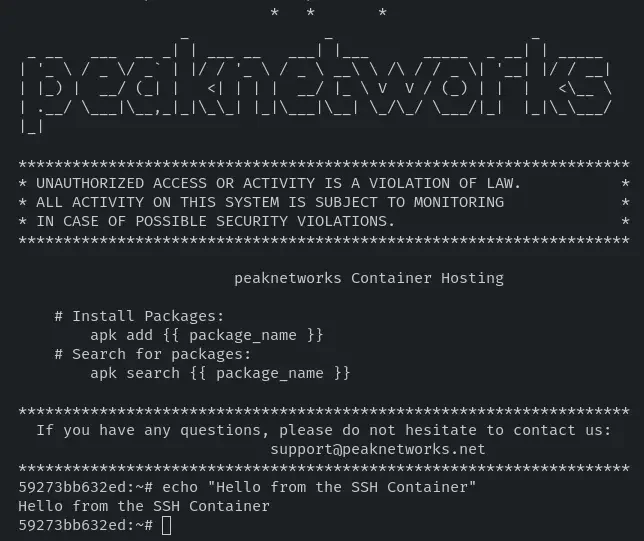

 CH
CH
 DE/AT
DE/AT
 EN
EN
